How Best to Edit 18 fps Video Files
It is best to maintain video at its true frame rate of 18 fps, especially when editing and outputting work to a final project. Keeping with the 18fps frame rate ensures the best and most natural looking playback experience of film originally captured at 18fps–this includes both Super 8 or Double 8 film (if the Double 8 was shot at 18fps.) The same holds true for film captured at 16fps–it's best to preserve it at 16fps.
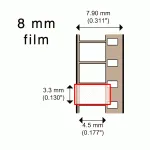
Double 8 film is also referred to as: Standard 8, Regular 8, Normal 8, and just 8 mm.
Editing 18 fps (or 16 fps) video is easy, and can be done with any video editor
However, keeping the original frame rate consistent with the final output frame rate, can be challenging.
Please note that it is not absolutely necessary to have that final output set to that same frame rate to edit your video. Changing the frame rate of the output file to a different frame rate, will inevitably introduce new frames in order to maintain the natural playback speed. In general this is not an issue; but, in order to retain ALL image details, it's highly recommended to keep the original frame rate. This way, you retain a true frame-by-frame standard, without introducing duplicate frames. Click here for more on the subject.
Further, it's best to keep all your options open, for any future image improvement work you may consider. You will be best served by keeping that original frame rate of the file, and keeping it as a "progressive" video stream (progressive vs interlaced video.)
I imagine that not too far in the future, motion interpolation software will get more sophisticated and will allow for a better and cleaner interpolation of grainy film images. As it stands right now, the software produces undesirable artifacts that show up as a 'granularity snow storm' in the grain -- an undesirable effect. As we await advancements in software interpolation (sometimes referred to as "optical flow"), we look forward to it opening up the possibility of doubling the frame rate from 18fps to 36fps, thus allowing for smoother-looking playback experiences during pans, tilts, and moving objects.
Tricks on how to retain an 18fps frame-rate throughout a project, including the final MP4 file
The most obvious way to preserve frame rate is to use a video editor that supports 18fps frame rates. Unfortunately, only a few editors support 18fps. Although professional editing software will import 18fps files into a project, the programs will only generate output files that are set to the project frame rate. Importing 18fps files will not cause a speed issue during playback. However, the editor will add duplicate frames here and there to make up for the difference in speed, and that's exactly what should be avoided. So, use a video editor that supports 18fps projects.
Cinelerra GG
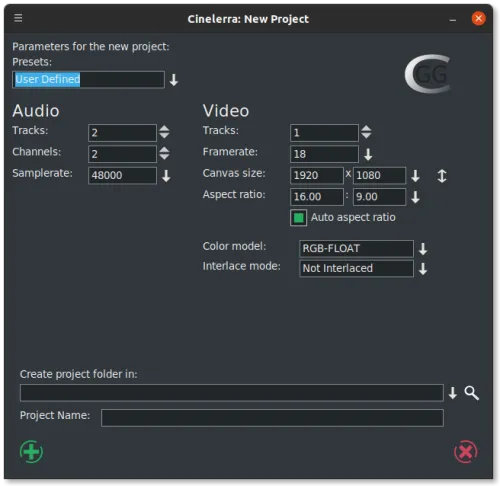
Cinelerra GG, is free, professional, and allows end users to start a project using any frame rate. Cinelerra GG runs on Ubuntu (a powerful Linux operating system that can be installed for free on any PC). The following is a screenshot of Cinelarra GG's “New Project” settings:Ubuntu Cinelarra GG also supports the AVI HQX codec right out of the box without first having to install the Grassvally codec.
DaVinci Resolve
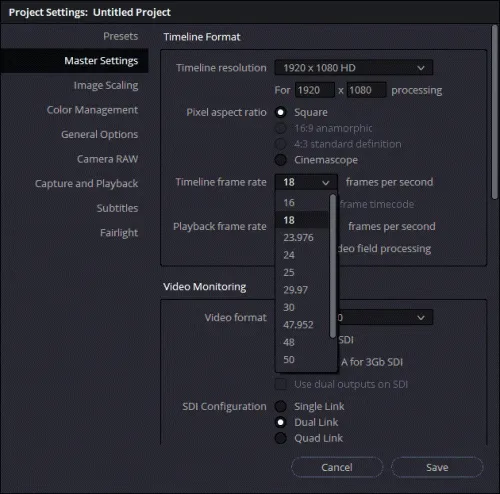
DaVinci Resolve, from Black Magic Design, also supports 18fps frame rates. Professionals use it to color grade, but Black Magic also offers a free version of the software, which has some limitations, but the limitations will have no affect on the types of projects covered here. Note: this software comes with a steep learning curve. DaVinci Resolve will run on Windows, Mac, and Ubuntu, and it allows projects to be set to 16fps and 18fps!If you know of any other software that supports 18fps project frame rates, please send us an email, and we'll compile a list.
A second option is geared more towards professionals who insist on using their preferred video editor (even if it doesn't support 18fps projects). It is a workaround, and a bit cumbersome if the end user plans on syncing music with the image. In short: use the ffmpeg software library (open source, free) to convert a file from 18fps to say, 24fps. Edit using a preferred editor at 24fps and set the output of the final project to 24fps. Then, convert the frame rate of the output file from 24fps, back to 18fps using ffmpeg.
ffmpeg changing frame rate from 18fps to 24fps, a step by step workflow
To convert a silent ProRes file from 18fps to 24fps, use the following command line:
ffmpeg.exe -r 24 -i C:input-filename.mov -vsync 0 -c:v prores -profile:v 3 -pix_fmt yuv422p10le -an C:output-filename.mov- Edit and export your project
- Convert back to a silent ProRes file set to 18fps:
To convert a silent ProRes file from 24fps back to 18fps, use the following command line
ffmpeg.exe -r 18 -i C:input-filename.mov -vsync 0 -c:v prores -profile:v 3 -pix_fmt yuv422p10le -an C:output-filename.mov


